bacground

Sunday, January 29, 2012

Every time we go on a road trip, I wish I had something to do my word puzzles on in the car...something with a flat surface and a pillow underneath for comfort...so I was thinking...and voila...I had all the pieces I needed to make it already in the house. I've included some instructions for those that may wish to make one too.

Supplies:
Old pillow for stuffing, or a bag of loose stuffing
material for pillow (2 pcs. ea 12x16")
old pressboard placemat (11.5 x 15")
2 pieces of scrapbook paper 12x12
length of ribbon
hot glue gun
modge podge and paintbrush


Take the two pieces of fabric and place them together right sides facing each other. Sew a seam  around the pillow , leaving a gap large enough to stuff. Zig zag the raw edges or serge if you have one.  Turn fabric to right side and turn the outside…stuff to desired thickness.
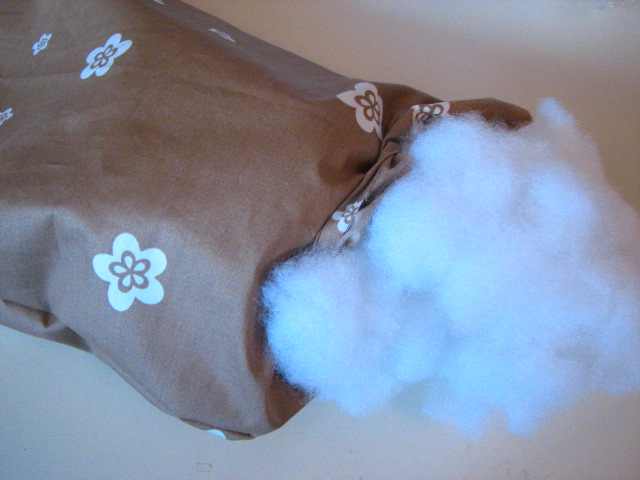
 
Hand stitch the opening after stuffing is done. Set aside.

Cut scrapbook paper to fit the placemat…I chose 2 co-ordinating papers and rounded the corners as the placemat had rounded corners. Once paper is cut, grab your modge podge and a large craft paintbrush, and apply a thin, even coat on the top of the placemat. Carefully place the papers on top and smooth out any wrinkles. I use an old wallpaper seam roller to smooth it all out.
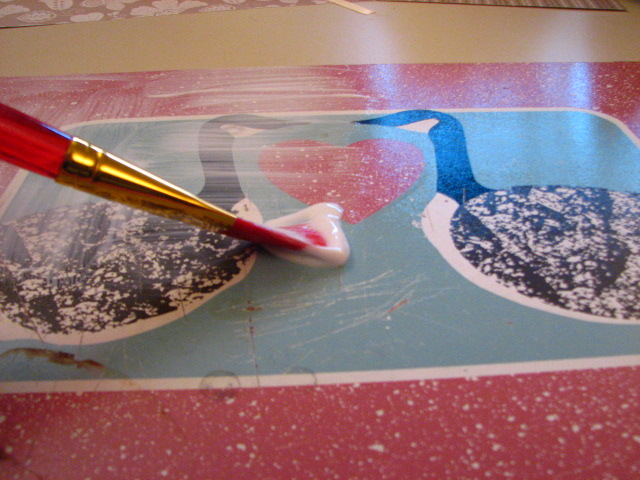
 
I cut a piece of ribbon to go over the seam. Apply a small amount of modge podge over seam and apply ribbon on top…let dry before proceeding to next step. ( I have a fake electric fireplace in my craft room and I just placed the board on the floor in front of the heat and it dries rather quickly)

Sand the edges with an emery board to smooth out edges and give a slightly distressed look to the edge.
 
Once dry, apply a thin, even layer of modge podge on top of the board, right over the papers. I find long, light, even strokes dry the cleanest rather than choppy brush marks, I go from the top to the bottom in one stroke to achieve this look. Also be sure to put a little all around the side edge to be sure the paper won’t lift at the edges.  Let dry completely
 
Once dry, apply a second coat of modge podge and let dry again. When dry, heat up your hot glue gun…when good and hot, apply a good amount of hot glue to the center area of the back of the placemat…you have to work quickly as the hot glue dries fast…center the pillow on the board and press. 
 
Run a bead of hot glue around the edge where the pillow with touch at the edges and once done, press the pillow into the glue, and use some heavy books to completely cover the pillow and leave until all glue is good and dry…and voila…you have a lap desk you can use in the car, out in the yard in the lawn chair, or wherever you need a flat surface on the go. Thanks for looking and happy crafting!!!

Thursday, January 26, 2012

Girly Purse Card


This card was so much fun to make...saw it in an old card making magazine and knew a friend who it was perfect for. It was made in Cricut Craft Room by welding two marquee shapes together from Storybook...it is an actual card that opens at the bottom. I also made two slightly smaller single shapes for the white piece on the outside and one on the inside to write on. The scalloped border was made with an edge punch, and then snipped at every "valley" between the scallops (much like when you are sewing on a curve, it is snipped to the seam so it sits flat) and then you manipulate it so it can follow a curve...hope that makes sense. The ribbon flower was made from a pin on Pinterest...instructions are here if you are interested...very simple to make. (its the red one with white polka dots...you have to scroll down a bit to see it)

Saturday, January 21, 2012

House Warming Card


Made this card for my husbands neice...who just bought her first house. The card base is from Wild Card...the fence is from Picturesque...flowers from a variety of carts including Forever Young, vine is from Home Decor, or maybe Home Accents, mailbox is from Wild Card. I made the envelope just out of a scrap piece of paper and the bird is from Serenade...the white trim under the roofline is a Martha Stewart Punch. It is a whopping 10 1/2" tall, and so I had to make my own envelope...the inside has another fence that is attached at the sides and bottom, so a gift card to a local home decor store can be inserted as a house warming gift.

Wednesday, December 28, 2011

Happy After Christmas...


Whew the holidays are almost over...nice being off work for the week and enjoying all the festivities! Thought I would show off some of the decor from Christmas that I have made, but just didn't post due to a lack of time...hee hee. Found the card tree on Pinterest...love love love that site...and thought it was such a clever idea for displaying Christmas cards...also shown are the treat boxes I made for Christmas day using the Wrap It Up Cricut Cartridge...filled them with either cinnamon roasted almonds or spicy asian almonds...they were a hit for sure!!!

Saturday, November 26, 2011

Front Door Decor


Found this idea on Pinterest...and already had all the components to make it happen...love the way it looks

Saturday, November 19, 2011

Paper Christmas Trees


A friend showed me these trees in an old card magazine, and knew I just had to make them...very simple to put together...the strips are 1"x3" and adhered at the ends...careful not to fold the other end...leave it loopy...then starting at the bottom of a cone shape, hot glue strips to cone...thats it...make a paper cone for the top and you are good to go.

Friday, November 11, 2011

Christmas Cards


Almost done all my Christmas cards for this year...whew...here are some I completed today

Sunday, November 6, 2011

More Ornaments


Found these on the Martha Stewart Site and they are so easy to make, a bit tedious with all the folding, but easy...love how they turned out...below is the link for instructions on how to make them...I used my cricut and the george cart for the circles, but a circle punch would also work
Holiday Card Ornaments

Tussie Mussies for my tree!!!


Decided to change the color scheme of my Christmas tree from purple/gold to green/chocolate/creme...and was finding it challenging finding ornaments in chocolate and creme...lots of white and opalescent...but not much creme...so after searching online, found some homemade ornaments that were perfect, and I could make them out of scrapbook paper in my colors of choice! So here they are and the links that I used to make them

Tussie Mussie Link


Paper Flower link

Wednesday, October 19, 2011

Christmas Ornament Card


Saw this idea on Splitcoast I think...lol...so had to make it...ornament is from Christmas Village

Monday, October 17, 2011

The Older the Violin...


Had to use my new quarter note cartridge I got in the mail last week...so many cool cuts

Friday, October 7, 2011

Meowy Christmas...for a cat lover


Made this card for a friend who is a huge cat lover...she has a black and a grey cat...so I thought I would make her a personal card for Christmas...hope she likes it.

Monday, September 26, 2011

Another Christmas Card


Made this card for RAQ's card challenge on the Cricut mb...feel free to join us...so much fun and inspiration, a truly great group of ladies...anyway...love the color combo, and I wouldn't have chosen these for a Christmas card, but I think they work. Stamps were cut out and popped up

Friday, September 23, 2011

Just Stamping...


Been snooping around the internet lately, looking for inspiration...found some really beautiful all stamped cards...I love my cricut, but wanted to try something a little different...for me anyway. So I made these cards with stamping only...I have a nice selection of stamps, but sometimes enjoy buying them more than using them...so this week I put them to good use...I hope? The big fern leaf is one of the very first stamps I bought...its foam and I think I bought it at J's in the wall stencil section...but it worked wonderfully with my inks...and then I traced around with a black fine tip gel pen. Have to give credit where credit is due...both of these were inspired by a website I found online called ImpressRubberStamps...check them out, they have stunning stamps!

Wednesday, September 21, 2011

Christmas Cards...


Been working on some Christmas cards...wanting them all to be special this year...so I`m getting an early start...this popup card was lifted from Splitcoaststampers...you can view the video here if you would like to make one...

Tuesday, September 13, 2011

I'm Baaaaaaaaaack!!!


Whew...full time work sure cuts into my crafting time...lol...but finally I have a chance to do what I love...create with paper. This week I'm hosing the weekly card challenge on the Cricut mb, and posted the following sketches from Page Maps to jump start your creativity...feel free to join the fun and post your creations on the thread...here are some sample cards I made to go with the sketches

Friday, June 3, 2011

"Hi" Cards


How fun are these...made one and had to make some more...used Basic Grey sticker letters and random papers...card is 51/4 "sq. Total lift from the new Page Maps book I just got

Monday, May 9, 2011

Quilt Card


Saw this technique somewhere online...probably Splitcoaststampers...and wanted to try it out...it's supposed to resemble a quilt...I used the Tim Holtz die for the flower and the papers are all from K & Co. Thanks for looking!

Friday, May 6, 2011

Mother's Day Layout 1999


When my daughter was 9, she was playing out in the yard, and yelled for me to come look...when I arrived at the window, there was a very special Mother's Day greeting on the front lawn done in grass clippings...lol...she is just too cute...so I took this one picture...and now all these years later, scrapped it. The plan for the layout came from RAQ's card challenge this week hosted by Shelbywoo...thanks for the inspiration Michelle!!!

Tuesday, April 5, 2011

Some New Cards


Whew...got back from a wonderful trip to Pigeon Forge TN...and actually got to make some cards last week. These were for RAQ's card challenge on the cricut mb...hope you like em.